
Plantillas
Aprende a generar un proyecto de Pixi’VN a partir de una plantilla, configurarlo en tu IDE, ejecutarlo y personalizarlo, y comprender su estructura de proyecto.
Puedes generar un nuevo proyecto a partir de una plantilla ejecutando:
npm create pixi-vn@latestDemo interactiva
Cómo usar una plantilla
Si estás leyendo esta página, probablemente ya tienes un proyecto generado a partir de una plantilla. Las siguientes secciones te guiarán a través de los primeros pasos para poner en marcha el proyecto.
Configuración inicial
Abre la carpeta del proyecto con tu IDE. Los ejemplos siguientes usan Visual Studio Code.
Una vez que el proyecto esté abierto, VS Code sugerirá automáticamente algunas cosas:
- Instalar las extensiones recomendadas — aparecerá una notificación pidiéndote que instales las extensiones recomendadas para el espacio de trabajo. Se recomienda encarecidamente aceptarla. Si la notificación no aparece, puedes instalarlas manualmente desde el panel de Extensiones filtrando por extensiones recomendadas.
- Ejecutar las tareas de inicio — VS Code puede pedirte que ejecutes las tareas de inicio configuradas, que instalarán todas las dependencias del proyecto. Si prefieres hacerlo manualmente, ejecuta:
npm installMultiplataforma
Si seleccionaste una plantilla orientada a plataformas de escritorio o móviles, necesitarás instalar las dependencias adicionales requeridas por Tauri (la cadena de herramientas de Rust y las herramientas de compilación específicas de la plataforma). Debido a que Tauri se integra profundamente con el entorno del sistema, probablemente necesitarás reiniciar VS Code una o varias veces antes de que el proyecto pueda ejecutarse como una aplicación de escritorio.
Ejecutar el proyecto
La plantilla incluye un conjunto de configuraciones de lanzamiento preconfiguradas para VS Code. Si no estás familiarizado con ellas: las configuraciones de lanzamiento son atajos que indican a VS Code cómo iniciar tu proyecto (y opcionalmente adjuntar un depurador), de modo que no necesites escribir comandos en la terminal cada vez. Puedes acceder a ellas desde el panel Run and Debug (el icono del botón de reproducción en la barra lateral izquierda, o pulsa F5). Selecciona la configuración que desees en el menú desplegable en la parte superior del panel y pulsa el botón verde de reproducción.
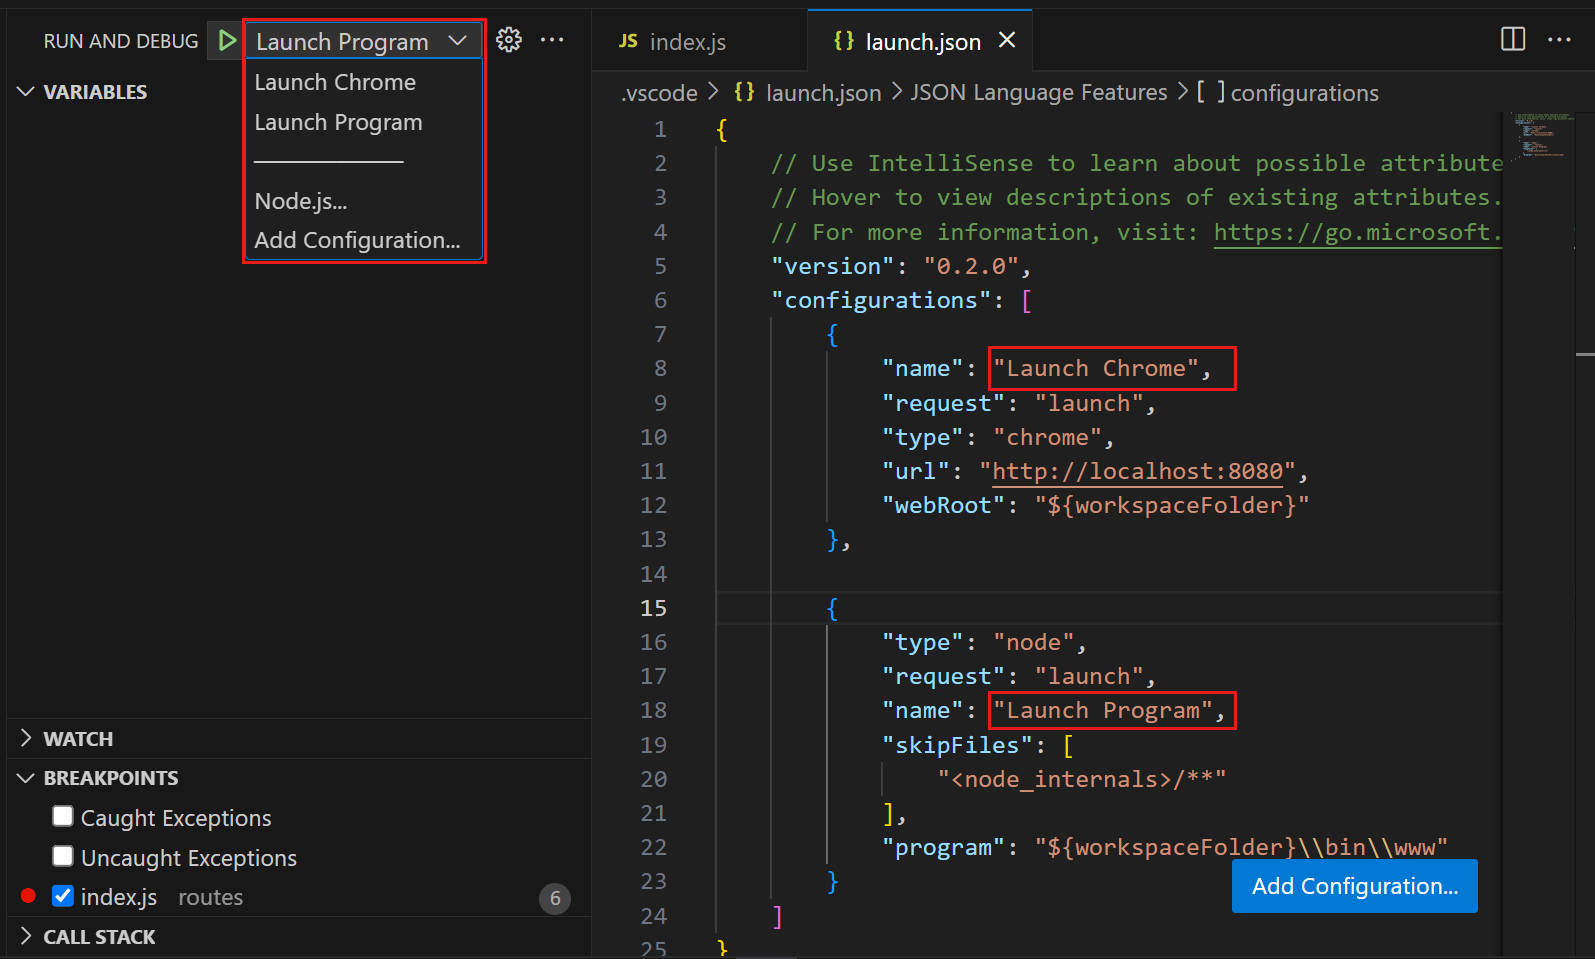
Las siguientes configuraciones están disponibles:
- Debug Game: esta es la configuración que usarás con más frecuencia durante el desarrollo — cada vez que guardes un archivo, el navegador se actualiza automáticamente. Ten en cuenta que en este modo las animaciones pueden no ser perfectamente fluidas y la carga de recursos puede ser más lenta que en la compilación final publicada.
- Debug Game Preview: simula fielmente cómo se comportará el juego una vez publicado: las animaciones son fluidas, los tiempos de carga son realistas y las optimizaciones están activas. Usa esta configuración cuando quieras verificar que todo se vea y se sienta correcto antes de publicar.
- Run as Desktop App (Dev): compila el backend de Rust/Tauri y ejecuta el juego como una ventana nativa de escritorio. Si tu plantilla no está orientada a plataformas de escritorio o móviles, esta configuración no estará presente.
Personalizar el estilo
La UI de la plantilla está construida enteramente con shadcn/ui, lo que significa que puedes personalizar el tema de color sin tocar el código de ningún componente.
Abre el creador de temas de shadcn/ui, ajusta los colores a tu gusto y luego navega a la sección Copy de la página para copiar el comando CSS generado. Ejecuta ese comando desde la raíz de tu proyecto:
npx shadcn@latest add <paste-the-generated-command-here>Una vez aplicado, se recomienda reformatear los archivos fuente:
npm run formatPara más personalización — fuentes, estilos globales y más — consulta Estilos y fuente.
Estructura del proyecto
Pantallas de la plantilla
La plantilla viene con un conjunto de pantallas prediseñadas que cubren las partes esenciales de una novela visual. Cada pantalla es un componente de React conectado a una ruta gestionada por TanStack Router.
- Menú principal (
/) — la primera pantalla que ve el jugador al iniciar el juego. Proporciona el punto de entrada para comenzar una partida nueva, continuar una guardada y abrir la configuración. - Pantalla de narración (
/game/narration) — la pantalla central de juego donde se muestra la historia. Renderiza el diálogo, los sprites de los personajes, los fondos y las opciones. - Configuración — el panel de configuración no tiene su propia ruta dedicada. En su lugar, usa Search Params para superponerse sobre cualquier pantalla que esté activa en ese momento. Este enfoque mantiene la URL limpia y, al mismo tiempo, permite al jugador abrir la configuración desde cualquier parte del juego, y navegar entre las secciones de configuración (audio, pantalla, idioma, etc.) sin perder de vista dónde se encontraba.
- Pantalla de navegación (
/game/navigation) — solo para Point & Click. Permite al jugador navegar entre habitaciones y realizar las distintas acciones disponibles en la ubicación actual. - Pantalla de mapa (
/game/map) — solo para Point & Click. Muestra el mapa y permite al jugador desplazarse de una ubicación a otra. También admite la gestión de varios mapas.